
When it comes to managing parking areas efficiently and safely, proper parking lot sign and post installation plays a critical role. Signs and posts guide drivers, pedestrians, and vehicles, ensuring a smooth flow of traffic while preventing accidents or confusion. This process is especially important for businesses as it helps safeguard property, support customer convenience, and enhance the overall layout of parking areas.
From construction to maintenance, the installation of parking lot signs involves various factors such as materials, costs, and equipment, all of which must be carefully considered to determine the best approach for each specific purpose. Whether for controlling traffic, marking entrances, or directing buses and cars, effective signage is essential to providing a well-structured and compliant parking environment.
Importance of Proper Parking Lot Signage
Proper parking lot signage plays a critical role in ensuring safety, organization, and accessibility within parking facilities. Clear and visible signs help guide drivers, reducing confusion and minimizing the risk of accidents or traffic congestion.
Additionally, proper signage supports compliance with local regulations and accessibility standards, such as those outlined by the Americans with Disabilities Act (ADA), ensuring spaces are inclusive for all users. Effective signage also contributes to a positive user experience, as it streamlines navigation and makes facilities more user-friendly.
By prioritizing well-designed and strategically placed signage, parking lot owners can create a safer and more efficient environment for everyone.
Understanding Parking Space Lot Signage Regulations
Clear and compliant signage is a fundamental aspect of any well-maintained parking lot. It not only ensures ease of use but also plays a critical role in maintaining safety and accessibility for all users.
Legal Requirements for Parking Lot Signs and Posts
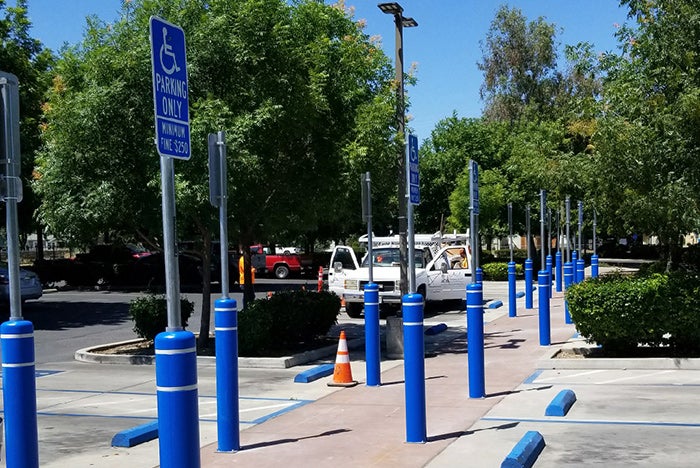
Parking lot signage serves a critical role in ensuring safety, organization, and accessibility. Legal requirements mandate that parking lot signs and posts adhere to established standards set by governing bodies, such as the ADA and MUTCD. These laws ensure that signs meet specific design, placement, and height criteria to support visibility and inclusivity.
Consequences of Non-Compliance
Failing to comply with parking lot signage regulations can lead to serious repercussions. Non-compliance might result in fines, lawsuits, or increased liability in the event of an accident. Additionally, businesses may face reputational damage for failing to provide safe and accessible facilities for their customers and employees.
Governing Bodies and Standards
Overview of ADA (Americans with Disabilities Act) Requirements
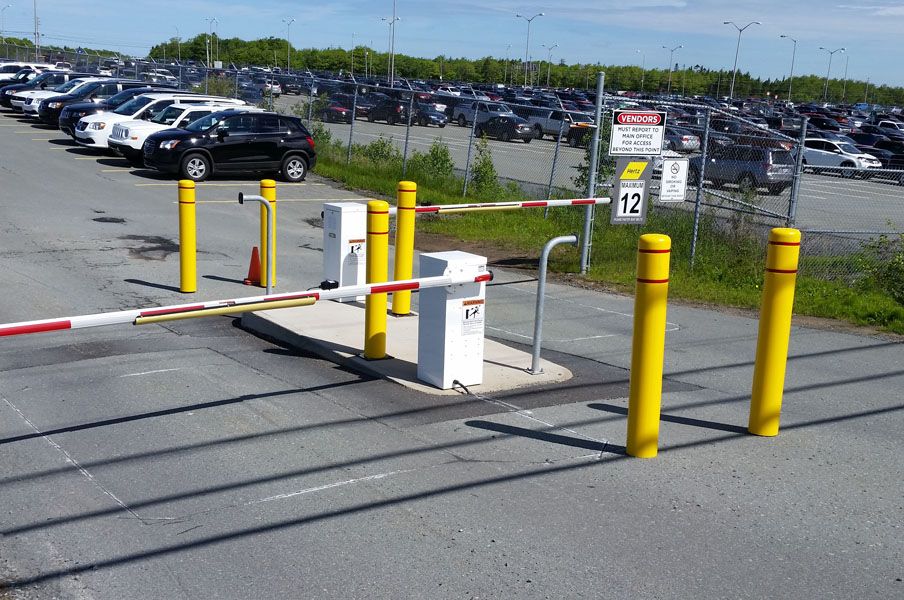
The ADA sets stringent standards for parking lot signage to ensure equal access for individuals with disabilities. These include requirements for properly marking accessible parking spaces, ensuring appropriate sign placement and height, and using reflective or easily visible materials.
MUTCD (Manual on Uniform Traffic Control Devices) Standards
The MUTCD outlines standards for traffic control devices, including parking lot signs. It provides specifications for sign shapes, colors, and reflective properties to ensure uniformity and clear communication across various settings.
Local Laws and Ordinances to Consider
Beyond federal regulations, states and municipalities may have additional requirements for parking lot signage. Business owners should familiarize themselves with local laws to avoid potential conflicts or penalties and to ensure their facilities meet all required standards.
Types of Required Parking Lot Signs
Handicap Parking Signs
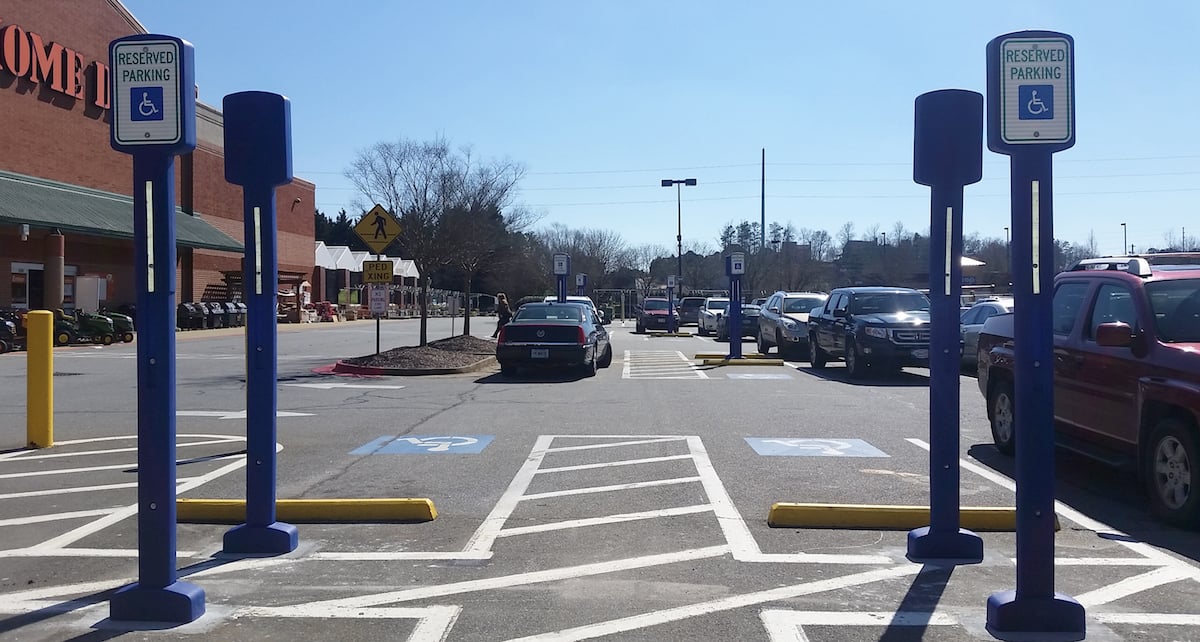
Handicap parking signs are essential for designating accessible spaces for individuals with disabilities. These signs must include the internationally recognized symbol of accessibility and comply with both ADA and local guidelines.
Stop and Yield Signs
Stop and yield signs regulate traffic flow within parking lots and ensure the safety of both pedestrians and drivers. These signs should be prominently placed at intersections to prevent accidents.
Directional and Wayfinding Signs
Directional and wayfinding signs are designed to guide drivers and pedestrians efficiently through parking lots. Common examples include signs for exits, entrances, and designated parking areas.
Fire Lane and No-Parking Zone Signs
Fire lane and no-parking zone signs are critical for maintaining emergency access and preventing unauthorized parking. Such signs are often required by fire codes and must be clearly marked and visible at all times.
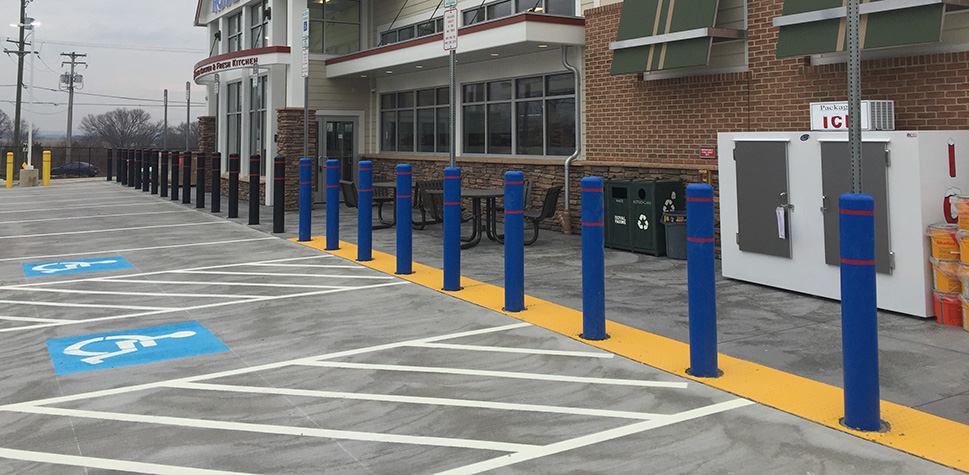
Tools and Materials Needed for Installation
Essential Tools
- Post hole digger or auger.
- Wrenches, drills, and screwdrivers.
- Level and measuring tools.
Common Materials
- Signposts (U-channel, square, round).
- Concrete or stabilizers for post anchoring.
- Fasteners and mounting brackets.
Recommendations for Durable and Weather-Resistant Materials
- Selecting high-quality materials for long-term performance.
- Coating options to prevent rust and wear.
Pre-Installation Preparation
Before beginning the installation, ensure that you have all the necessary tools and materials prepared. Verify the installation site complies with local regulations and is clear of obstacles.
Planning and Placement
- Assessing parking lot layout and traffic flow: Evaluate the parking lot’s design to determine traffic patterns, entry and exit points, and pedestrian pathways. Understanding these factors will help identify the most effective sign placements for guiding vehicles and ensuring safety.
- Determining optimal locations for visibility and compliance: Place signs where they are easily visible to drivers and pedestrians, adhering to local regulations and standards. Consider line-of-sight, proximity to intersections, and the purpose of each sign to maximize its effectiveness.
Marking and Measuring
- How to mark precise post locations: Use marking tools such as chalk or stakes to clearly indicate where each post will be installed. Double-check measurements to ensure alignment with traffic management plans.
- Ensuring signs are installed at regulation height and angle: Reference local guidelines for appropriate sign height, typically measured from the ground to the bottom edge of the sign. Use a level to confirm the angle and orientation of the sign for clear visibility.
Obtaining Necessary Permits
- How to check for required permits and approvals: Research your local municipality or regulatory agency’s requirements for parking lot signage. Ensure compliance with zoning laws, accessibility standards, and traffic codes.
- Steps to contact local authorities if needed: Reach out to relevant local agencies or departments to apply for permits. Provide details about the planned installation, including layout designs, sign types, and intended locations. Address any feedback or adjustments requested by authorities to secure final approval.
Step-by-Step Guide to Sign and Post Installation
Once you have obtained all the necessary information and approvals, it’s time to install your parking lot signs. Here are some steps to follow to ensure a successful installation process:
Digging and Setting the Post
- Proper depths for different post types: The depth of the post hole is crucial to ensure durability and stability. For typical signposts, dig a hole that is at least 1/3 the total height of the post. For instance, if the post is 9 feet tall, the hole should be 3 feet deep. Be sure to consult any local guidelines, as they may stipulate specific depth requirements based on wind load or soil type.
- Stabilizing posts with concrete or other methods: After placing the post in the hole, use materials like concrete or gravel for stabilization. Concrete is generally recommended for higher durability, especially in areas with poor soil conditions or high winds. Pour the concrete into the hole around the post, ensuring it fills evenly, and use a level to confirm the post remains upright as the concrete sets. Alternatively, gravel can also be used for less permanent installations or where drainage is a concern. Tamp the gravel firmly to provide support.
Attaching the Sign
- Correct placement of signs on the post: Position the sign at the appropriate height as dictated by local regulations. For example, parking signs typically require a minimum clearance of 7 feet from the ground to the bottom of the sign in pedestrian areas to ensure visibility and safety.
- Securing signs with brackets or fasteners: Use high-grade brackets, bolts, or tamper-resistant fasteners to attach the sign to the post securely. Ensure that the fasteners are evenly tightened and do not over-compress, which could damage the sign or cause warping over time. Follow manufacturer instructions for the specific type of mounting hardware to guarantee a durable and professional-looking installation.
Ensuring Alignment and Visibility
- Using a level to check vertical and horizontal alignment: It is essential to check the alignment of the post and sign both vertically and horizontally to maintain professional standards and ensure the sign is easily readable. Use a plumb or bubble level for accuracy, making adjustments before the concrete or stabilizing material sets.
- Verifying the sign is unobstructed: Inspect the surrounding area to confirm that the sign is fully visible from all intended angles. Clear any vegetation or obstructions that might reduce visibility. Additionally, test the visibility at varying distances and lighting conditions to ensure compliance with regulatory standards and optimal effectiveness for users.
Post-Installation Inspection and Maintenance
Conducting a Final Check
Inspecting Signpost Stability and Placement
Once installation is complete, examine the signpost to ensure it is stable and securely fixed in its position. Gently apply pressure or attempt to wiggle the post to confirm it does not move or loosen under normal conditions. Verify that the placement aligns with the intended design specifications and meets site requirements for visibility and accessibility.
Ensuring Compliance with Regulations
It is critical to cross-check the installation against applicable local, state, or federal regulations. Review standards for height, positioning, and alignment, as well as any specific requirements for the type of signage installed. Document compliance by taking photos or notes to keep as part of formal records.
Routine Maintenance
Tips for Cleaning and Caring for Signs to Ensure Visibility
Regular cleaning prevents dirt, debris, and environmental buildup that could obscure signage. Use mild soap and water with a soft cloth to clean the surface, avoiding abrasive materials that could scratch or damage reflective coatings. Inspections should also ensure reflective surfaces remain effective, particularly for road or directional signs.
Checking for Wear and Tear or Damage
Over time, environmental factors such as wind, rain, UV exposure, and impact from debris can deteriorate signs and their posts. Inspect for signs of corrosion, fading, cracks, or deformation. Additionally, check any fasteners or brackets to ensure they are intact and secure. Conduct these evaluations periodically, especially after severe weather events.
Handling Repairs or Replacements
When and How to Replace Damaged Signs or Posts
If a sign or post is found to be severely damaged or no longer meets visibility and safety standards, it should be promptly replaced. Remove damaged components carefully to avoid harming the surrounding area or adjacent infrastructure. New installations should follow the original specifications or updated regulatory guidelines, ensuring consistency in placement and design.
Ensuring Quick Fixes to Maintain Regulatory Standards
When minor repairs are necessary, such as tightening bolts or patching small scratches, address these issues immediately to maintain the integrity of the sign. Use approved materials and tools that are compatible with the sign construction. Keeping a kit of common repair supplies on-hand can help speed up response times, ensuring minimum disruption for users and compliance with safety standards.
Common Mistakes to Avoid in Sign Maintenance
Being aware of common mistakes and avoiding them can go a long way in maintaining the quality, safety, and effectiveness of your signs. Here are some key things to avoid when maintaining your signage:
Ignoring Regular Maintenance
One common mistake is neglecting regular maintenance checks, assuming that signs will remain functional indefinitely. This can lead to undetected wear and tear, increasing the risk of failure or non-compliance with safety regulations. Always adhere to a consistent inspection schedule, especially in areas where pavement and asphalt conditions may affect sign stability.
Using Incorrect Cleaning Methods
Applying harsh chemicals or abrasive tools during cleaning can damage the surface of signs, reducing their lifespan and visibility. Ensure that only recommended cleaning products and techniques are used to maintain both durability and readability. This is particularly important in locations with well designed parking lots, where signage needs to remain clear for optimal security.
Overlooking Environmental Factors
Failing to account for environmental conditions, such as extreme weather, sunlight, or pollution, may lead to premature fading or structural damage to signs. Consider materials and coatings that are designed for the local climate to maximize longevity. Signs located near wheelstop barriers or ramps should be especially resilient to withstand daily wear.
Delaying Minor Repairs
Procrastinating on small repairs, such as fixing loose bolts or repainting faded areas, can escalate into larger, more costly issues over time. Address minor problems promptly to prevent further deterioration and ensure consistent safety compliance, saving money and avoiding complex fixes that vary by sizes depending on the sign and mounting.
Not Following Manufacturer Guidelines
Improper installation or maintenance due to disregarding manufacturer-provided instructions can lead to compromised sign performance. Always review and follow the manufacturer’s recommendations to ensure optimal results and longevity, particularly when dealing with the front end of signs exposed to harsh conditions.
Benefits of Professional Installation
While some sign installations may seem straightforward, hiring a professional can provide several benefits that make it worth the investment. These include:
Expertise and Experience
Professional installers possess the knowledge and hands-on experience required to set up signs correctly and securely. Their expertise ensures compliance with local regulations and standards while minimizing the risk of errors that could compromise the sign’s performance or safety, especially in complex areas such as courses with multiple ramps and traffic controls.
Proper Tools and Techniques
Professionals have access to specialized tools and techniques tailored for sign installation. This ensures precise placement, durability, and aesthetic appeal, resulting in a polished and professional look for your signage, including the installation of wheelstop barriers and coordination with asphalt paving.
Time and Cost Efficiency
Hiring professionals saves time and reduces costly mistakes that could arise from DIY attempts or improper installation. Their ability to efficiently handle the process ensures optimal results without unnecessary delays or expenses, protecting your money and investment.
Warranty Protection
Many signage warranties require professional installation for the warranty to remain valid. By opting for expert services, you not only safeguard your investment but also ensure that any future issues are addressed under the warranty terms.
Enhanced Safety
Improperly installed signs can pose risks to both people and property. Professionals follow stringent safety practices to prevent hazards related to installation, ensuring the sign remains securely in place even under adverse weather conditions, especially in areas with heavy traffic or near ramps and wheelstop barriers.
DIY vs. Professional Installation – Pros and Cons
When deciding between DIY and professional installation, it’s important to weigh the pros and cons of each option to determine what best suits your needs.
DIY Installation – Pros and Cons
Pros
- Cost Savings: DIY installation can significantly reduce expenses as you’ll avoid labor costs associated with professional services.
- Flexibility: You can work on your own schedule, making it convenient to install the sign at a time that suits you best.
- Sense of Achievement: Completing an installation on your own can provide a sense of accomplishment and personal satisfaction.
Cons
- Lack of Expertise: Without specialized knowledge, there is a higher risk of errors, which could affect the sign’s durability and effectiveness.
- Time-Consuming: DIY installation often takes more time due to the learning curve, especially for complex setups or large signs.
- Limited Tools and Resources: Installing signs may require certain tools or materials you may not have on hand, leading to additional costs or subpar results.
Professional Installation – Pros and Cons
Pros
- Expertise and Precision: Professionals bring experience and technical skills, ensuring the sign is installed securely and correctly.
- Warranty Protection: Many manufacturers only cover warranties if the sign is installed by a certified professional.
- Time-Efficient: Hiring experts saves time, as they are equipped to complete the job quickly and efficiently.
Cons
- Higher Cost: Professional installation can be costly due to labor charges and any additional service fees.
- Scheduling Dependence: You might need to work around the professional’s availability, which could delay the project.
Understanding the trade-offs between DIY and professional installation is key to making the best decision for your needs. While DIY might appeal to budget-conscious individuals, professional installation offers peace of mind and long-term reliability.
Challenges and How to Overcome Them
While both DIY and professional installation have their benefits, they also come with their own unique challenges. Here are some common challenges you might face in each option and how to overcome them.
Lack of Expertise
One of the biggest challenges with professional installation is ensuring the technician is experienced and reliable. To overcome this, research companies thoroughly by reading reviews, asking for recommendations, and confirming certifications or licenses before hiring. This is especially important when installing signs or structures near utility poles, access points, or around complex parking layouts like those in university campuses.
Unforeseen Costs
Sometimes, additional costs can arise during the installation, such as unexpected repairs or the need for extra materials. To address this, request a detailed estimate upfront and clarify if there are any potential hidden fees. Keep in mind other considerations like code requirements or accessibility requirements that could impact costs.
Communication Gaps
Miscommunication between you and the installer can result in delays or unsatisfactory results. To prevent this, clearly outline your expectations and any specific requirements prior to the project start, and maintain open communication throughout the process. For example, confirming exact measurements with a measuring tape or specifying the locations of barrier gates, parking lot edges, or parking stalls helps avoid misunderstandings.
Efficient planning and clear communication are essential to ensuring a smooth and successful installation, regardless of the challenges that might arise.
Conclusion
By taking the time to research potential installers, understand the full scope of the project, and maintain clear communication, you can significantly reduce the risks associated with installations. Proper planning and transparency are critical to ensuring the process goes smoothly and successfully meets your expectations. Whether tackling a small home project or a larger commercial installation—such as managing parking slots or installing warning signs—these steps will help ensure a positive outcome and a stress-free experience.
FAQs
How do I choose the right installer?
To choose the right installer, start by researching their credentials, experience, and customer reviews. Ask for recommendations from trusted sources and verify that they are licensed and insured. Meeting with multiple installers and requesting detailed quotes can also help you make an informed decision, especially if your project involves residential areas or complex commercial zones with specific code requirements.
What should I include in a contract with an installer?
A comprehensive contract should outline the scope of work, project timeline, payment terms, and any warranties or guarantees. Additionally, include details about materials, the responsibilities of each party, and a contingency plan for unexpected circumstances to avoid misunderstandings. Be sure to address other factors such as nighttime visibility or handling standing water near the installation site.
How do I prepare my parking lot layout for installation?
Prepare your space by clearing any obstructions, ensuring easy access to the work area, and protecting nearby surfaces or belongings from potential damage. Communicate with your installer about any specific requirements to avoid delays or complications. This may include confirming placement relative to following signs, barrier gates, or parking lot edges.
What steps can I take if there are issues during the installation?
If issues arise during the installation, address them promptly by discussing the situation with your installer. Document the problems and refer to the terms of your contract if necessary. Open and respectful communication is key to resolving issues effectively and finding a win win situation.
How do I maintain the installation after completion?
Follow any maintenance instructions provided by your installer to ensure the longevity of the project. Regular cleaning, inspections, and addressing minor repairs promptly can help maintain the system or structure and prevent larger issues in the future, particularly in high-traffic areas or locations near utility poles and access points.